Subscribe To Miss Dress Up


Wednesday, May 4, 2011
Monday, April 11, 2011
Lacura Cosmetics, Interesting!
Hi Everyone,
Sorry for the looooong silence. I am having some serious uploading issues. I have approximately 6 videos I have recorded. I have tried to upload different ones several times to no avail. They start uploading, say they will take approximately FIVE HUNDRED minutes to upload and when they get to about 140 minutes left...they fail. Then my power was out for three days, oh the joy. Once that was back on I began the uphill uploading jaunt again...with the same results. Last night I FINALLY had a successful upload so here are the details about the products featured in said video:

Video: http://www.youtube.com/watch?v=8dDsRRVqkkU
Lacura Beauty Duo Eyeshadow in 101 Latte Macchiato. A beautiful swiss chocolate and vanilla eyeshadow duo. Goes on smoothly, very pigmented and blends easily. Wears beautifully, no creasing, fading or color changing and stayed on until I removed it. I didn't have any reactions as far as eye or skin irritations and the product over all was very impressive. $3.49. You can't beat that! As for how the rest of the eye shadows work in the line, I do not know. Yet...
Lacura Beauty Waterproof Mascara in black. The first time I used it the formulation felt dry and thin. After using it again my first impression changed. The formula was thicker, adhered to the brush and my lashes much better and wore well. No flaking or clumping. My only complaint is that it isn't black enough for my taste. $3.49
These cosmetics and skin care products are actually produced specially for Aldi Grocery Stores-
http://www.aldifoods.com/us/html/product_range/7196_ENU_HTML.htm
This is their introductory statement:
Welcome to Lacura, the gorgeous beauty brand that’s been picking up awards, out-performing big names and causing a storm across Europe. It’s hard-working, feel-good beauty at prices you really won’t believe.
And here is a link to the cosmetics they carry:
http://www.aldifoods.com/us/html/product_range/7196_8622_ENU_HTML.htm
And their skincare products:
http://www.aldifoods.com/us/html/product_range/7196_7202_ENU_HTML.htm
My Thoughts:
I am very impressed by the range of products they offer, the quality of the eye shadows and somewhat the quality of the mascara and definitely by the value for the prices they charge. I will definitely be trying more of their products in the VERY near future. (maybe even today..) I'll give you a little update if they have any of the products in the store, which ones and if I purchase any I will let you know how they perform. Go ye to Aldi today! ;0)
Thursday, March 17, 2011
Straight, flat, frizz free, FANTASTIC!
Hello and get ready to be WOW'D!!!!!! My Daughter and I are "flat out" amazed at this hair straightener. You see..we've been using a $35 one for over a year now. It snags our hair, doesn't actually straighten it and leaves behind a mountain of frizz. So when we got this one we both decided that pin straight was the style for us! (that may change next week of course but for now it's the do of choice)
Here's the lovely I'm talking about, isn't she cute?:
 Ours is purple but they have two other colors, black and blue. The other styles of straighteners they sell come in more colors including but not limited too zebra print. The "recommended retail price" on the box is $250. The website (www.herstyler.com) sells it for $170 (it's the Superstyler if you're looking it up) but I found it on Amazon for $149 ( http://www.amazon.com/Herstyler-SuperStyler-PURPLE-Ceramic-Styler/dp/B004PWIZ0Q/ref=sr_1_1?ie=UTF8&s=beauty&qid=1300373068&sr=8-1). I know in the video I said $80.99 but that was a different Herstyler. They have several styles that are less expensive than the superstyler. I can't give you a review on those though, I'm sorry.
Here's the specs on the Superstyler from their website:
The Superstyler is our latest HerStyler addition to the hair straightening revolution.
Onyx ceramic plates guarantee smooth straightening motion without pulling or breaking of hair.
Hair becomes up to 3 times smoother and silkier than when using ordinary ceramic iron.
True ceramic plates generate 6 times more negative ions than regular ceramic irons.
Cut your hair straightening time in half thanks to a high concentration of negative ions.
Negative ions renew hair with softness and shine, while eliminating frizz.
Ultra lightweight: the body is made of lightweight, high-strength composite materials that are commonly used in the aerospace industry.
Faster heat up time than conventional coil straightening irons. It will rise to the desired temperature in less than 25 seconds, saving electricity and prolonging the straightener’s lifespan.
The Superstyler has a built in ON/OFF switch and temperature control dial keeping temperature under your control.
1.5” ceramic plates that reach a max temperature of 500 degrees Fahrenheit and an ergonomic design that is easier to handle – Designed in Italy with American technology
Includes safety Glove and Matt for ease and protection
Free shipping and handling
Available in three colors (black, blue and purple)
And apparently if you buy it from them you get a FREE one year warranty to where mine only came with a 90 day. Which is still better than nothing and considering I only paid $13 for it I think that's good. If I had paid $170 or even $149 I would want AT LEAST a year. You can buy longer warranties as well. The 2 year is $19.95 and the 3 year is $34.95. Not bad to make sure such an investment is protected, right!? That's a lot better than paying another $170 to get another straightener that works as beautifully as this one!
So..here's the demo. Enjoy!
http://www.youtube.com/watch?v=JUA8jZKoWyM
Here's the lovely I'm talking about, isn't she cute?:

Here's the specs on the Superstyler from their website:
The Superstyler is our latest HerStyler addition to the hair straightening revolution.
Onyx ceramic plates guarantee smooth straightening motion without pulling or breaking of hair.
Hair becomes up to 3 times smoother and silkier than when using ordinary ceramic iron.
True ceramic plates generate 6 times more negative ions than regular ceramic irons.
Cut your hair straightening time in half thanks to a high concentration of negative ions.
Negative ions renew hair with softness and shine, while eliminating frizz.
Ultra lightweight: the body is made of lightweight, high-strength composite materials that are commonly used in the aerospace industry.
Faster heat up time than conventional coil straightening irons. It will rise to the desired temperature in less than 25 seconds, saving electricity and prolonging the straightener’s lifespan.
The Superstyler has a built in ON/OFF switch and temperature control dial keeping temperature under your control.
1.5” ceramic plates that reach a max temperature of 500 degrees Fahrenheit and an ergonomic design that is easier to handle – Designed in Italy with American technology
Includes safety Glove and Matt for ease and protection
Free shipping and handling
Available in three colors (black, blue and purple)
And apparently if you buy it from them you get a FREE one year warranty to where mine only came with a 90 day. Which is still better than nothing and considering I only paid $13 for it I think that's good. If I had paid $170 or even $149 I would want AT LEAST a year. You can buy longer warranties as well. The 2 year is $19.95 and the 3 year is $34.95. Not bad to make sure such an investment is protected, right!? That's a lot better than paying another $170 to get another straightener that works as beautifully as this one!
So..here's the demo. Enjoy!
http://www.youtube.com/watch?v=JUA8jZKoWyM
Wednesday, March 16, 2011
Elizabeth Arden-Like An Old Friend
Good Day to you! I always feel quite honored when you stop in to read my blog posts. It really means a lot to me!
**CORRESPONDING VIDEO, PLEASE WATCH**:http://www.youtube.com/watch?v=BN4Ys6YlmhM
Today I'd like to introduce to you my long time friend, Elizabeth. She and I go way back. You see, my Mother introduced me to her when I was about 12 years old and we've been friends since then. We drifted apart for a few years but we're together again at last!
Of course I'm talking about Elizabeth Arden, the cosmetics company. Here's a wee bit of history on the woman and the company:

Florence Nightingale Graham (December 31, 1884 – October 18, 1966), who went by the business name Elizabeth Arden, was a Canadian-American businesswoman who built a cosmetics empire in the United States. At the peak of her career, she was one of the wealthiest women in the world.


PREVAGE® transforms anti-aging skincare with advanced Idebenone technology, the most powerful antioxidant available today* with an EPF® rating of 95. Re-engineered to help create a reserve within the skin to release protective and corrective benefits when and where needed most. Measurably diminishes the appearance of lines, wrinkles, minor scars, redness, age spots and sun damage so skin looks younger than ever.
PREVAGE® Face addresses major skincare concerns with proven results:
- Fine lines, wrinkles, age spots and discolorations appear reduced.
- Redness and minor scars and existing sun damage look minimized.
- Skin looks firmer and more radiant.

**CORRESPONDING VIDEO, PLEASE WATCH**:http://www.youtube.com/watch?v=BN4Ys6YlmhM
Today I'd like to introduce to you my long time friend, Elizabeth. She and I go way back. You see, my Mother introduced me to her when I was about 12 years old and we've been friends since then. We drifted apart for a few years but we're together again at last!
Of course I'm talking about Elizabeth Arden, the cosmetics company. Here's a wee bit of history on the woman and the company:

Florence Nightingale Graham (December 31, 1884 – October 18, 1966), who went by the business name Elizabeth Arden, was a Canadian-American businesswoman who built a cosmetics empire in the United States. At the peak of her career, she was one of the wealthiest women in the world.
In 1909 Arden formed a partnership with Elizabeth Hubbard, another culturist. When the partnership dissolved, she coined the business name "Elizabeth Arden" from her former partner and from Tennyson's poem "Enoch Arden".
In 1912 Arden travelled to France to learn beauty and facial massage techniques used in the Paris beauty salons. She returned with a collection of rouges and tinted powders she had created. In an era when it was generally only acceptable for entertainers to wear makeup, Arden introduced modern eye makeup to North America. She also introduced the concept of the "makeover" in her salons.
Arden collaborated with A. Fabian Swanson, a chemist, to create a "fluffy" face cream. The success of the cream, Venetian Cream Amoretta, and corresponding lotion, Arden Skin Tonic, led to a long-lasting business relationship. This revolutionized cosmetics, bringing a scientific approach to formulations. Other innovations included creating foundations that matched a person's skin tone; creating the idea of the "Total Look" in which lip, cheek, and fingernail colors matched or coordinated; and the first to make a cosmetics commercial shown in movie houses.
During World War II, Arden recognized the changing needs of the American woman entering the work force. She showed women how to apply makeup and dress appropriately for careers outside the home. She created a lipstick called Montezuma Red, for the women in the armed forces that would match the red on their uniforms.
In recognition of her contribution to the cosmetic industry, she was awarded the Légion d'Honneur by the French government in 1962.
Arden died in New York City in 1966 and was interred in the Sleepy Hollow Cemetery in Sleepy Hollow, New York under the name Elizabeth N. Graham. (taken from a Wikipedia article-http://en.wikipedia.org/wiki/Elizabeth_Arden)
When I was young my Mother used to use Elizabeth Arden products and one of my all time favorite perfumes is Red Door by this company. It reminds me of so many good things from my past including my wedding day.
Recently I found the EA counter in my local Dillard's store and had some money my Mother had given me for my Birthday. The sweetest most genuine little woman from Jerusalem was working. She spent well over 30 minutes talking with us, showing us things (but not pushing to buy), explaining in great detail how they work and about the company and gave us several hefty samples of some of their most expensive products. She even said if she ever retires she would call me to take her job. WOW! What a dream that would be for me. *sigh*
The first thing she showed us is the Ceramide capsules. (there is one for the face and another for the eyes) Here's what the package claims:

Pure, potent, intensive single dose capsules. Our innovative CLX Complex delivers the restorative power of Ceramides and essential lipids to help strengthen skin's barrier against the visible signs of time.
- Visibly improves skin tone and clarity.
- Supports skin's own natural collagen levels for a firmer, more resilient look.
- Works to minimize the appearance of fine lines and wrinkles.
- Retexturizes skin for a noticeably softer, smoother look.
- Fragrance, preservative and emulsifier free.
To open capsules twist tab around twice.
I've been using them for five days now and I really feel they are amazing. My skin feels a little firmer, smoother and definitely softer! I am considering purchasing them even though they are a bit on the pricey side. (maybe I should have asked for them for my Birthday..too late.) The ones for face and throat are $58 for a two month supply and the eye formulation is $52 for two months. Pricey but not out of sight in my opinion.
The next thing she showed us was the Prevage serum. Here are the claims on the packaging:

PREVAGE® transforms anti-aging skincare with advanced Idebenone technology, the most powerful antioxidant available today* with an EPF® rating of 95. Re-engineered to help create a reserve within the skin to release protective and corrective benefits when and where needed most. Measurably diminishes the appearance of lines, wrinkles, minor scars, redness, age spots and sun damage so skin looks younger than ever.
PREVAGE® Face addresses major skincare concerns with proven results:
- Fine lines, wrinkles, age spots and discolorations appear reduced.
- Redness and minor scars and existing sun damage look minimized.
- Skin looks firmer and more radiant.
I have also been using this for five days and I can honestly say the appearance of the discolorations on my face from acne scarring/hyper pigmentation has faded some. You apply this cream in the morning and top it with your normal moisturizer. The only thing I don't like about this product is the price...$155 for a 7 month supply. I realize it's for 7 whole months but I just can't shell out that much money at once. But oh how I would love to because I think it would really work to help the my skin's appearance and in turn I wouldn't have to use such a full coverage foundation. Maybe one day....there's always Christmas! LOL
The item I actually went to the counter FOR is this:
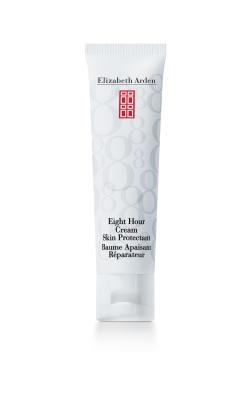
It's a skin protectant, moisturizer, glosser and more. A lot of MUA's use it to "glossify" a model's skin, eye lids, lips etc. You can use it to keep your brows in place, for your dry elbows, feet, hands etc. I actually ended up getting a promotional package that contained the original cream, a hand cream and a lip treatment all for $25. And they are all full size products! In the video I show you what it looks like and more. Hopefully this was helpful to some of you who are searching for something to help your skin. Thank you for stopping in today!
Wednesday, March 9, 2011
To Shape a Brow
Well, here it is. The requested brow tutorial. Actually this is the first of two. This one is about the tools you need as well as how to figure out what shape you're going for. The next will be on how to actually get them to that shape through tweezing etc.
Video-http://www.youtube.com/watch?v=-g7m7Qji_5I
The items I go over in the video are as follows:
Tweezers (mine are by Revlon)
Fill in product of your choice (I use NYC Browser Duo which is powder and wax with an angled eyeliner type brush.)
You can use a brow pencil, brow cream product or even just an eyeshadow in your shade.
Eyebrow Stencils-I have some by Ardell that I picked up at Sally's Beauty Supply. I had another brand but I must've given them away..

A brow highlighting product of some sort to give you a wee little "lift" there. I sometimes use the Anastasia brow highlighting pencil.

There are so many many things that factor into making your eyebrows look great. This is a VERY general explanation for those who are just starting out and really don't have a clue where to begin. One thing to remember when trying to learn how to make your eyebrows the shape you want them is they are Sisters, not twins. Meaning they will look somewhat alike but most likely, unless you are completely drawing them on, never look exactly the same. That's ok, it's natural.
Another thing to keep in mind is that it can be somewhat of a daunting task at first and takes a bit of practice to start getting them the way you want them. Mine are at about stage 3 of getting to the point where I like the look of them and the shape. Out of all the things I have learned and am studying, brows are one of the more difficult to master. BUT they are also one of the main focal points of the face and it's very important that you do learn at least the basics of shaping and filling in. They really do frame the face. A lovely brow with a little bit of mascara and lip gloss can make you look more rested, put together and alive. So together we can figure out this puzzle that are eyebrows. Good luck!
Video-http://www.youtube.com/watch?v=-g7m7Qji_5I
The items I go over in the video are as follows:
Tweezers (mine are by Revlon)
Fill in product of your choice (I use NYC Browser Duo which is powder and wax with an angled eyeliner type brush.)
 |
| This comes in several different colors. |
 |
| This one is by Lauren Luke |
You can use a brow pencil, brow cream product or even just an eyeshadow in your shade.
Eyebrow Stencils-I have some by Ardell that I picked up at Sally's Beauty Supply. I had another brand but I must've given them away..
A brow highlighting product of some sort to give you a wee little "lift" there. I sometimes use the Anastasia brow highlighting pencil.

There are so many many things that factor into making your eyebrows look great. This is a VERY general explanation for those who are just starting out and really don't have a clue where to begin. One thing to remember when trying to learn how to make your eyebrows the shape you want them is they are Sisters, not twins. Meaning they will look somewhat alike but most likely, unless you are completely drawing them on, never look exactly the same. That's ok, it's natural.
Another thing to keep in mind is that it can be somewhat of a daunting task at first and takes a bit of practice to start getting them the way you want them. Mine are at about stage 3 of getting to the point where I like the look of them and the shape. Out of all the things I have learned and am studying, brows are one of the more difficult to master. BUT they are also one of the main focal points of the face and it's very important that you do learn at least the basics of shaping and filling in. They really do frame the face. A lovely brow with a little bit of mascara and lip gloss can make you look more rested, put together and alive. So together we can figure out this puzzle that are eyebrows. Good luck!
Monday, February 28, 2011
Wake up little Susie...
Or Barb or Nicole or Melissa...whatever your name may be, here are some tips to help your face appear more awake on those days when you feel and look like you could have stayed in bed for two more days, I mean hours. Here's a little video for you describing them in detail. http://www.youtube.com/watch?v=WAsCzSA4Tx4
Our eyes and skin seem to take on a dark appearance when we are tired or not feeling well. Dark as in shadowed, not tanned. If that were the case people would want to be tired all the time. Ahem..ha ha. Our lips, however, tend to turn pale in these instances. So we will start off brightening those tired eyes:
1. A light/white/bright color applied to the inner corner of the eye, also considered the tear duct area, helps to draw light into that space and dispell the dark shadows that tend to hover there when we are tired/sick.
2. A brightening under eye concealer helps to remove the dark shadow from underneath the eye. I use Revlon Age Defying Concealer in the color Light. It stays in place, doesn't cake up and is brightening without making it look "white".
3. Either a flesh toned or white eye liner pencil applied to the lower water line does wonders for making the whites of your eyes appear whiter and brighter. I prefer a flesh tone but it's a personal preference. I use the Anastasia Brow Highlighting pencil for that as opposed to on my brow bone which is what it was intended for. You can buy a white lining pencil in almost any brand including but not limited to NYC. You can also use a pale yellow color which is quite lovely!
4. Eye lash curler. Let's curl those droopy lashes ladies! It really really does open up the eye and make it appear more "awake". Lashes hanging down in your eye draws the own down and makes it seem more "closed" and sleepy.
On to the face. We tend to look "dull" when we are tired/sick so a nice highlighting powder or cream (if you have dry skin I recommend the latter and vice versa for us oily girls). In the video I show you the best places to apply that highlight to draw light into the face and make yourself appear more "alive" as opposed to putting it in the "wrong" places and appearing oilier. I use a Mac Mineralized Skin Finish in the color Soft and Gentle. Physician's Formula makes a nice one called a "Shimmer Strip" that comes in different shades and those are available at most drug stores. They are a little more pricey than your regular "drug store buy", or for my friends from the UK, "high street brand" but still much less expensive than Mac. And they are just as lovely.
And lastly the lips. I don't know about you but I tend to go white in the lip area when I'm tired and/or sick. Not a pretty look on anyone. I like to use something that is just the same color as my natural lip color to bring the color back. I used Covergirl's Lipslick in Bronze Goddess which is just a tinted lip balm. Very natural.

 And now that we are all looking wide awake, here's a few photos so you can see these products in action!
And believe me I was tired today!
Monday, February 21, 2011
Rev up your natural/neutral look FAST
Konnichiwa! (that means Hello in Japanese) I'm glad you're here. I have filmed and uploaded sort of a "part two" to the neutral/natural look I filmed a few days ago. Have you ever heard your Husband/Boyfriend say "hey honey, let's go out for dinner!" on one of those days when you've done the bare minimum with your hair and make up not to mention your "outfit" is anything but an outfit? And of course he's already on his way home from work and has been as such for the past 20 minutes...uh oh.
Or how about at the last minute, when you thought you were just staying in for the umpteenth night in a row, putting the kids to bed and hoping to find a little entertainment with a netflix movie? Needless to say you're probably looking anything but cute and BAM, your friend texts and says "HEY, I have a babysitter for you and I wanna take you out for sushi. I'll be there in 30 minutes!" WHAT! you say. My hair is standing on end, I have eyeliner smeared under my eyes and I'm wearing polka dot jammy pants and my silk shirt from work today. I can't go anywhere! Yes, yes you can. And this video will help you with at least your make up, your hair and clothes....well, you're on your own there. He he he.
In the video I start off wearing a minimal amount of make up, something you might wear just on a daily basis while running errands and whatnot. Or it's just your daily, natural look. Then we take it up a notch to a look that's more suitable for going out to dinner or to church or just anytime you want to wear "a little something more". And we do it quickly. It's a little slower in the video than it actually takes of course because I'm talking to you and stopping to show you things. But in real life this "revving" would take me about 5 minutes. So go ahead, go for sushi! Tell your Husband/Boyfriend "SURE, we can go out honey!" because you've got the quick fix for that dead or just not too exciting make up.
Here is what I used in the video:
Eyes-
Mac 217 brush for the crease color
Matte dark brown color in the E.L.F Beauty Encyclopedia Neutral's Edition palette (Target, $5) in the crease and under the eye. Eco Tools smudger brush for under the eye.
Covergirl Outlast Smoothwear All Day Eyeliner in Onyx
L'oreal Voluminous mascara in Carbon Black
Brows-NYC Browser in Brunette
Cheeks-
Motives Shape and Sculpt Duo (it doesn't have a "color" on it) to contour
Mac Mineralized Skin Finish in Soft and Gentle for highlighting (a good dupe for this is by Hard Candy, you can get that brand at Walmart and they have a powder that looks almost exactly like this one I showed you in the video)
Blush (already on from previous video) was Laura Gellar Blush-N-Brighten in Pink Grapefruit on the apples of the cheeks
Lips-
Revlon Velvet Chrome lipstick in Garnet Chrome-if you have a problem with your lipstick feathering outside your lip line you can use a lip liner in the same shade as your lipstick or the same color as your natural lip color to help build a barrier to keep your lipstick in the lines)
I am very sorry that I don't have any still shots of either, I don't know what took over my brain. I completely forgot to take pictures! Please forgive me, I'll remember next time. If you have any questions at all please leave me a comment and I'll do my best to help. Have fun!
Nicole
Saturday, February 19, 2011
Quick and Natural
Good Morning Everyone, (well it's morning to me right now anyway ;0))
I've finally been able to film two videos for the series "Why should I wear make up". I wanted the very first video to give you the ability to quickly achieve a neutral/natural look for any time. Something that could be your "every day look", doesn't take much time or effort and you can achieve it with inexpensive products. It's also suitable for anyone of any age. **I must stop here and apologize. I'm still fairly new to this "YouTube/Blogging" concept and it seems I forgot to take pictures of this look before changing it for the second video. I'm very sorry, I'll do better next time I promise.
Video:http://www.youtube.com/watch?v=4SFqr8XYytY
Here is what I used in the video:
Face-
Revlon Colorstay Foundation in 110 Ivory
Revlon Photo Ready powder in 10 Fair/Light (which I've decided is too light for me so I switched to 20 Light/Medium)
Laura Geller Blush-N-Brighten in Pink Grapefruit (any blush in the color you naturally blush is fine)
Eyes-
NYC Browser Brush On Brow Kit in Brunette (I get this at Target or Walmart)
Urban Decay Primer Potion in the color Eden (matte skin tone) *This is optional but does help keep your shadow in place longer and helps neutralize any redness etc on the lids.
Revlon Matte eyeshadow in Vintage Lace (any color that matches your skin tone is good. A matte color is best if you're going all the way to the brow with it)
E.L.F dark brown matte shade from The Beauty Encyclopedia Neutrals Edition (Target-$5) on one eye.
Covergirl Outlast Smoothwear All Day Liner in 300 Onyx (I really don't care for too many Covergirl products but this one is a decent black eyeliner if you're going for a more natural look as it's not very black but did stay in place all day)
L'oreal Voluminous mascara in Carbon Black
Lips-
Sonia Kashuk Velvety Matte Lip Crayon in 07 Barely Nude
OR
Softlips tinted lip conditioner/sunscreen in Pearl
All of these items can be purchased at Walmart or Target with the exception of the Urban Decay primer. If we are going to talk primers (meaning you are interested in purchasing one) I recommend the Mac Paint Pots (painterly for those with pinky undertones and soft ocre for those with more yellow undertones. They have TONS of colors though) over Urban Decay or any of the others. They crease less, stay on longer and give your shadows a smoother base to glide onto. A primer also makes your shadow more vibrant. But like I said, it's optional. Also, I am not pushing Mac products by any means. Like any other brand some of it's good and works like it should and some of it....just doesn't.
The next video in the line up is how to turn this everyday/natural look into something just a little more dramatic for evening or anything where you feel you want a little more "oomph". It's still neutral and definitely nothing over the top. I hope this is helpful to you, let me know if you have any questions or comments. The best way to get a question/comment to me is to leave it on the YouTube video if I have attached one. If not then under the corresponding blog post. Have a great day!
Nicole
Thursday, February 10, 2011
Some Things To Show You
Hello Everyone,
Thanks for taking the time to read my blog post. I recently went to Rite Aid and ran across a few clearance items that were a bit unique so I thought I'd share them with you. I've used most of them at this point except one and I'll get back to you on that one. Here is the link to the corresponding video: http://www.youtube.com/watch?v=KNqWz5uettk
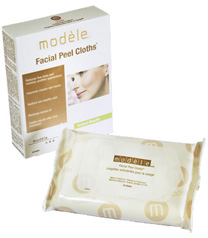
The first item is the Modele brand Facial Peel Clothes. They are sort of like the pre-moistened make up removing clothes etc that you can find about anywhere these days. I use those on a regular basis. These are not intended for that and you are actually supposed to cleanse your face before using them. One side has a "grainy" texture, almost like a fine grit sand paper but softer. It feels quite nice and ex foliating which is always good! The other side is just soft cloth. You use the grainy side first and then the other. Wait 1-2 minutes, then rinse with warm water. The package claims this: an extremely effective one-step and easy to use peel system, thanks to their combined mechanical and chemical action. Use weekly to greatly improve the efficiency of your skin care products. It also claims you will see immediate results. While I do like the feel of them I did not experience any immediate noticeable results after one use. I will keep using them and let you know what I think after at least two weeks of use. They were originally $14.99 at Rite Aid but on clearance for $4.99. I'm not sure if that means they will no longer be selling them or not but you can still order them online at this website in the UK that ships to the US. They are $14 pounds there with free shipping. http://www.thebeautygenie.com/Face/c3/index.html
 The next product I show you in my video is the Divinci Clogged Pore Strips, much like the Biore brand strips that remove blackheads and oils to unclog pores. This is the product I have yet to try but will certainly update you here and the video when I do. The line is "for men" but I don't see why a woman couldn't use them. There are only four in the package and were originally $5.99. I find that a little pricey to be honest. I will use one and ask my Husband to do the same and I'll let you know if we think they are worth the original price in case you can't find them on clearance like I did for $1.49.

I also picked up a cuticle remover that was originally $2.99 but was only $.74. I think I know why...it didn't work. Well, it didn't work for me. I used it exactly as directed on the package with no cuticle removed at all. Not my favorite I must say.

The final item was the Rite Aid brand buffing block for nails. I really love these things and have used several brands, from expensive to prices like this one, and they all seem to work rather well to be honest. This one was originally $2.99 and was $1.49 on clearance. These buffing blocks really get the ridges out of your nails as well as put back the natural shine to where you almost don't even want to polish them they look so good!
Well, that's all for now. If you would like to see more product intro's just let me know. I really love doing them for you! Have a great day and don't forget to watch the corresponding video!
Thanks,
Nicole
Modele Facial Peel Clothes-I did end up using this one time so far and though it feels good when using it I didn't see any "immediate" results. I am going to continue using them though and will update once I've done that. The grainier side feels quite nice and ex-foliating and the other side is fairly soft. I did try to register my product purchase but the website seemed wonky.
**UPDATE as of February 25, 2011. These are a waste of money in my opinion. Especially if you pay $14.99 for them. I didn't see any results and they all dried out in the pack quickly.
Originally $14.99 Clearance $4.99
Divinci Clogged Pore Strips-I have no used these as of yet but will be doing so this evening and will update tomorrow.
$5.99 originally 1.49 Clearance
Quickie Cuticle Remover-Wasn't too impressed with this. I did it exactly the way it said on the package but it didn't seem to remove anything at all.
$2.99 Originally .74 on Clearance
Rite Aid Buffing Block- Works as intended with no issues
Originally $2.99 $1.49 on clearance
Thanks for taking the time to read my blog post. I recently went to Rite Aid and ran across a few clearance items that were a bit unique so I thought I'd share them with you. I've used most of them at this point except one and I'll get back to you on that one. Here is the link to the corresponding video: http://www.youtube.com/watch?v=KNqWz5uettk
The first item is the Modele brand Facial Peel Clothes. They are sort of like the pre-moistened make up removing clothes etc that you can find about anywhere these days. I use those on a regular basis. These are not intended for that and you are actually supposed to cleanse your face before using them. One side has a "grainy" texture, almost like a fine grit sand paper but softer. It feels quite nice and ex foliating which is always good! The other side is just soft cloth. You use the grainy side first and then the other. Wait 1-2 minutes, then rinse with warm water. The package claims this: an extremely effective one-step and easy to use peel system, thanks to their combined mechanical and chemical action. Use weekly to greatly improve the efficiency of your skin care products. It also claims you will see immediate results. While I do like the feel of them I did not experience any immediate noticeable results after one use. I will keep using them and let you know what I think after at least two weeks of use. They were originally $14.99 at Rite Aid but on clearance for $4.99. I'm not sure if that means they will no longer be selling them or not but you can still order them online at this website in the UK that ships to the US. They are $14 pounds there with free shipping. http://www.thebeautygenie.com/Face/c3/index.html

I also picked up a cuticle remover that was originally $2.99 but was only $.74. I think I know why...it didn't work. Well, it didn't work for me. I used it exactly as directed on the package with no cuticle removed at all. Not my favorite I must say.
The final item was the Rite Aid brand buffing block for nails. I really love these things and have used several brands, from expensive to prices like this one, and they all seem to work rather well to be honest. This one was originally $2.99 and was $1.49 on clearance. These buffing blocks really get the ridges out of your nails as well as put back the natural shine to where you almost don't even want to polish them they look so good!
Well, that's all for now. If you would like to see more product intro's just let me know. I really love doing them for you! Have a great day and don't forget to watch the corresponding video!
Thanks,
Nicole
Modele Facial Peel Clothes-I did end up using this one time so far and though it feels good when using it I didn't see any "immediate" results. I am going to continue using them though and will update once I've done that. The grainier side feels quite nice and ex-foliating and the other side is fairly soft. I did try to register my product purchase but the website seemed wonky.
**UPDATE as of February 25, 2011. These are a waste of money in my opinion. Especially if you pay $14.99 for them. I didn't see any results and they all dried out in the pack quickly.
Originally $14.99 Clearance $4.99
Divinci Clogged Pore Strips-I have no used these as of yet but will be doing so this evening and will update tomorrow.
$5.99 originally 1.49 Clearance
Quickie Cuticle Remover-Wasn't too impressed with this. I did it exactly the way it said on the package but it didn't seem to remove anything at all.
$2.99 Originally .74 on Clearance
Rite Aid Buffing Block- Works as intended with no issues
Originally $2.99 $1.49 on clearance
Sunday, January 30, 2011
Personal Make Up Kit Essentials Part 2
Welcome back for the second and final video (http://www.youtube.com/watch?v=SOuEobG3nVE) on what I suggest to have in your basic personal make up kit. Hopefully these have been helpful to some of you.
The battery operated trimmer is called a Lumina and I use that in place of tweezers a lot of the time. I'm not fond of tweezing and I know some of you probably aren't either. The only "down" side to using the trimmer instead is the fact that the hair does grow back a little quicker but that doesn't bother me. You can get the Lumina at Walmart and some drug stores or you can order it here:http://www.asseenontv.com/prod-pages/finishing_touch_trimmer.html. This site is pretty expensive and you have to pay a hefty shipping charge so I don't recommend getting it there. I only paid $7.99 for mine in the store.
The next item I suggest is a good face primer to go on under your foundation or even to wear alone to mattify the skin to keep down shine and it will also fill in any large pores, fine lines and the like. I have tried Hard Candy's primer called Sheer Envy (sold at Walmart for $8). I'm not particularly fond of it because I have a lot to fill in...ahem. But if you have particularly good skin you could use it. I've also tried Smashbox's primer called Photo Finish. It's quite a bit more expensive but very much like the one from Hard Candy. I currently use Loreal's Studio Secrets Magic Perfecting Base and LOVE IT. Controls shine for me all day, keeps my make up in place a lot longer than just on it's own and it fills in the fine lines and my large pores. It's $10.99 at Walmart. (I did a review on this in a past blog) The Motives brand primer (Invisi-Line) I talk about in the video is somewhat like the Hard Candy and Smashbox primers but a little thicker. I would recommend this for someone who doesn't need the mattifying feature (you have dry skin) because it's a good primer but doesn't control shine. I'm going to do a review on the products I've tried by Motives so far. I have four.
The next thing I recommend is an eye primer. And that is a primer to keep your eyeshadows from creasing, fading and causes them to go on more vibrantly. The one I showed you in the video is Urban Decay's Primer Potion in the color Eden which is just a flesh color and is matte. They have a shimmery pink color one called Sin. They are $18 for a small and $23 for the large at www.sephora.com. It's a decent primer, I prefer Mac's paint pots as a primer however. They come in many colors and do a better job of covering the lid and giving your shadows a place to stick to. They are $16.50 at the Mac store and website ( http://www.maccosmetics.com/product/shaded/154/1573/Paint-Pot/index.tmpl) There are also some less expensive alternatives. Palladio (sold at Ulta and online) sells a decent primer and it's $7.99 at http://search.ulta.com/search?p=Q&srid=S1-5&lbc=ulta&ts=custom&w=*&uid=214136460&method=and&af=brand:palladio&isort=date&view=grid&srt=12. NYX brand (also sold at Ulta and online and some drugstores like Walgreens) has one but I don't recommend that one. A primer is a great addition to your kit even if you don't want to wear eye shadows really. You can put on a wash of your primer and one shadow on the lid and be done with it for a neutral day time look.
This is something that helps keep your make up on your face longer and can be used to apply your shadows wet. It's a make up setting spray. The two I mentioned in the video are Make Up Forever Mist and Fix that can be purchased at Sephora (http://www.sephora.com/search/search_results.jhtml?command=text&attr1=mist+and+fix&attr2=&/com/sephora/search/endeca/ui/EndecaSearchFormHandler.search=search&_D:/com/sephora/search/endeca/ui/EndecaSearchFormHandler.search=+&maxRecords=18&recordOffset=0&seeAllCategory=false&searchString=mist+and+fix&x=0&y=0&_DARGS=/includes/searchFinder.jhtml). The large bottle is $27 and the trial size is $7. The second one was Mac's Fix Plus spray which is $19 on the Mac website as well as the store. I like them both the same. I also use those to apply eye shadows wet sometimes. It helps keep your shadows in place better than just using water. Do bear in mind that these sprays have a tendency to give a "sheen" to the skin and can cause a bit of a "plastic" effect in photos so if you are having portraits done I don't recommend using a setting spray.
The next two items are just very basic things you can pick up at Walmart or even a dollar store. A non-latex make up sponge which usually comes in packs of 3+ and are disposable. You'll want to use it maybe 3 times and then throw it away as they are VERY difficult to clean and bacteria can build up in the center of the sponge. The next is a basic powder applicator that usually comes with pressed powder but you can buy them seperately. They are great for patting your powder into your foundation as opposed to dusting it on and having it sit on top looking, well, powdery. ;0)
Everyone needs something to define their eyebrows with. Even if you have nice thick brows you will need to redefine them after applying foundation or tinted moisturizer or powder etc. They tend to get "lost" and a bit covered during that process. Brows frame the eyes and are VERY important to a nice polished look. So even if you aren't going to wear much else, throwing on some mascara, lip tint of some sort, a little blush and defining your brows can really rev up your look with very little effort. Powders look the most natural as pencils can tend to look "shiny" because of the wax in them. However, if you have very sparse or patchy brows you will need to use a pencil first and a powder over top to set it and take the shine away. I use NYC's Browser powder which comes with a wax to hold your brows in place if they are unruly and a small brush for putting it on. I prefer a thinner angled brush so I use a different one but you may like the brush it comes with. Very inexpensive at Walmart. I can't seem to find the price on the site but it runs between $3 and $5. A brow pencil is also very inexpensive and can be purchased just about anywhere in the cosmetics department. I am currently using one by Ardell that I bought at Sally's Beauty Supply for $3.99 here: http://www.sallybeauty.com/Brow-Pencil/ARDELL04,default,pd.html?cgid=Cosm&cm_vc=SEARCH
Next let's add some ever important mascara to our kit. Each person has a certain type of mascara that they like. Whether it be lengthening, thickening, curling and so on. I have thin, short, straight lashes so I need one that does all three. So...I use two. Sorry, it's the way it is. HA HA. I use Loreal Panoramic Curl and Loreal Voluminous Carbon Black. I also use Make Up Forever's Smokey Lash that can be purchased at www.sephora.com for $22. A bit pricey but well worth the money! My philosophy is the darker the mascara the better. It really helps to bring definition and attention to the eyes.
Let's get into the brushes. For the face I recommend some sort of foundation brush because it helps to get a more flawless application than the fingers and ensures an even coverage. You can use a host of different things all the way from the traditional flat, taklon bristle brush to a stippling brush like I show you in the video. A sponge, a blush brush, airbrushing, you name it. BUT for the basic make up kit I recommend either the flat foundation brush or the stippling brush to get a good even and quick coverage. You can get these in many many places but to save you time and money I will give you two brands that are very inexpensive and easy to find. Eco Tools makes great brushes and you can get them at Target, CVS and Walgreens for sure and possibly Walmart. Also Studio Tools are good brushes and can be found the same places. One more is Sonia Kashuk that can be purchased at Target. All great options and a lot less expensive than say Mac brushes. However, I've not seen a stippling brush in any of those brands, thus the reason I bought mine at Mac. You can however order a good and less expensive one from www.crownbrush.com. Great brushes that lots of make up artists use. If the eye shadow applicators work for you and you feel more comfortable, by all means use them. I can't get the shading, blending etc I like with those so I use brushes on my eyes. Some things you just can't do with those applicators such as getting a precise line under the eye or getting a good blend between colors etc. You can get all the brushes I mention in the video by the same brands I named above for foundation brushes. The fluffy blending brush to help blend between colors as well as lay down a wash of color over the entire lid. A soft dome brush to place a darker color in the crease and outer corner of the eye but in a fairly large area. A pencil brush to get in the small areas like darkening the outer V of your eye and running shadows underneath the eye, a flat eyeshadow brush for patting color on the moving lid. A small smudger brush to do detail work. A crease brush to go right into the crease of your eye to help contour and define. A lip brush if you prefer putting on lipstick with a brush to help get a more precise shape. Especially for dark and red colors. The large eyeshadow brush is one of my favorites because I can use it for both patting color on the moving lid and blending larger areas of color. A blush brush that is soft and fluffy yet compact. An angled blush brush for contouring the face. You can also use your stippling brush or your contour brush to apply your highlight to your cheeks etc if you want to do that. A powder brush if you prefer to put powder on with that. I prefer to pat powder on.
A good matte bronzer is essential for both bronzing and contouring the face and even the eyes. Jemma Kidd makes a great one called Show Glow Bronzing Powder in Expose and it's sold at Target and costs between $18 and $22. There's also a good one by NYC you can get at Walmart and drugstores etc called Sun 2 Sun bronzing powder. It costs between $3 and $5 depending on where you get it.
A highlight powder helps to bring out your features and highlight things that may otherwise kind of "disappear". It can give the illusion of having better cheekbones, fuller lips, a slimmer straighter nose etc. I use Mac's Mineralized Skin Finish in Soft and Gentle. It costs $28 at Mac but there are MANY MANY others available that aren't as pricey. (I got mine for Christmas ;0)) Here's what it looks like in the pan:http://www.maccosmetics.com/product/shaded/159/782/Mineralize-Skinfinish/index.tmpl. You just want something with a nice shimmer that goes with your skin tone.
Blush is another thing that is great to have in your kit. It puts color back into your face once you've created a blank canvas with foundation or powder etc and can also help the structure of your face appear "different". A cream blush is best for those of you with especially dry skin. You can get a mousse blush by Maybelline in their Dream Mousse collections at any drugstore. NYC carries a good one in a stick form called a Blushable Creme Stick. They come in several different colors and the formula is very nice. Mac also makes cream blushes as does many many other cosmetics companies. Powder blushes are a better choice for us oily skinned ladies. For a low end brand I really like Loreal's powder blushes. A high end brand that is great is, again, Mac. I also love Chanel and Make Up Forever. A "middle of the road" brand would be the Laura Gellar I showed you in the video. Her's are "baked" blushes.
As far as eyeshadow's go it's really a preference as far as what you like and don't like. Some people really like a lot of color like purples and blues and greens etc. Others like to stick with the more neutral family. Either way you go with it it's still a good idea to have one or two "base" colors that you can use with anything and to give you a nice blank canvas on your eye to work with. You want to make sure you cancel out any redness and cover any veins etc that may be on your eyelids. It also helps to blend your other shadows easier. Choose a matte color that is close to your skin tone. The one I show you in the video is Vintage Lace by Revlon and can be purchased at any drugstore/Walmart/Target etc. I paid $3.99 for mine. I use this as an all over wash before applying any other shadows but after my primer.
Also on the subject of eyeshadows, a lot of people like to just use a one color "wash" and throw on their mascara and be done. Cream eyeshadows are good for that and come in a plethora of colors and finishes. You can get matte, shimmer, satin finish which is nice. Always remember this rule on your entire face:if you apply something wet or creamy ALWAYS top it off with a powder to set it and keep it in place. A cream shadow is great but if you don't set it it will slide right off your eye within the hour. So you can use a powder in the same color family or if you want to layer colors you can do that very easily. Like using a black cream shadow and topping it off with a green powder or blue or silver etc to give a different effect. Quick and pretty! The one I am showing you is the NYX brand sold at Ulta and some CVS stores. They are $5.99 and have a TON of pretty colors, they're called Jumbo Eye Pencils. The one here is called Rust:http://www.nyxcosmetics.com/index.php?pf=JEP.
A GREAT investment that actually ends up saving you money as well as time is an eyeshadow palette of some sort. The one I am showing you in the video is by ELF (eyes, lips, face) and was $5 at Target at Christmas time. You can order them on their site here:http://www.eyeslipsface.com/elf/eyes/eyeshadow/beauty_encyclopedia_basic_eye_edition. Just be aware that you may run across a few of them that tend to be a bit more "chalky" and need to be worked with more to get them to go on and stay where you put them. Another great place to get palettes that are inexpensive but good quality is http://www.coastalscents.com/cfwebstore/index.cfm. They have tons of different kinds, color schemes, ones you can put together yourself etc. They also have great brushes, face products etc and are super inexpensive. LOVE IT! What you want for a basic kit for every day is something that has a good array of neutral colors, some mattes, some satin finishes and maybe even a shimmer or two. Remember to keep those satins and shimmers contained on the moving lid ladies! We don't want sparkle to the brow. ;0)
And don't forget a good matte black eyeshadow for setting eyeliner, smoking out a look for evening, defining the lash line and crease for different looks and much more. I use Carbon from Mac but NYX sells one just called Black that is just as good and a quarter of the cost. (again, I got it for Christmas. WOO HOO!)
A nice basic black and a basic brown eyeliner are essential to your kit. They work wonders at defining the lash line or amping up a daytime look for the evening, for smudging them out etc. I find that Loreal makes very nice retractable soft and smudge-able (in a good way) eyeliners called Pencil Perfect and the Lineur Intense pencils. That way they aren't dry, hard pencils and you can't get the color to transfer to your eye without doing a science project to do so. And again, remember your wet/dry rule! I really enjoy gel liners but they are more difficult to work with if you're not used to it.
And finally, let's finish off the look with a nice nude lipstick in your shade. If you are fairly light skinned you'll want to stick with one in the shade family that I show you in the video. It's called Birthday Suit by NYX and is a great color for any look really. You just want to find something that is 1 to 2 shades darker than your natural lip color and in the same color family as your natural lip color. I also recommend a cream formula as opposed to a matte or a shimmer/shine/sparkle. That way it's not dry and you can add a gloss if you want to add some shine.
Sorry about the end of the video being so abrupt..ahem. I might have mentioned it's been very difficult for me to get anything filmed lately due to the work being done on one of our bathrooms among other things. Hopefully the bathroom will be done this week and I can get back to my regularly scheduled filming! If you have any questions, concerns, need help finding a color or brand or anything at all please don't hesitate to ask. I have a special "from my heart" video coming up next that I really want all of your input on. God bless you all and thanks for stopping by!
Friday, January 28, 2011
Essentials for a personal make up kit-Part 1
Hello Everyone,
Long time no video/blog! If you've read my other recent blog posts you understand what's been happening. To recap, I had my son whom has Autism home for over two weeks on Christmas break, then over another week due to snow, then I went to Florida to see my Sister and kids and we've had people remodeling a bathroom. Whew...a lot has been going on. BUT I'm back and am hoping to be able to blog and record videos for you on a much regular basis now. The bathroom is still under construction but they should be done the end of next week. WA HOO! I'll even give you a picture or two when it's all done.
Today's video (http://www.youtube.com/watch?v=Ib0PaUDxAzc) is only 7 of the things I have picked out to show you that you will need for a basic everyday make up kit for yourself. I'll give you some options on brands you can use of each different thing, both high end and drug store. It's always nice to have options isn't it?
First up we have moisturizer. This is key to getting a good flawless foundation/tinted moisturizer look. Even if you have oily skin, and I do, you need to use moisturizer. It helps balance the skin and keep you from getting any patchy dry spots etc. It also helps keep the skin looking younger. We'll put it this way-dry = prune. ;0) I am currently using Alba Aloe and Green Tea oil free Moisturizer and loving it! The post before this one has more information on that.
Next I recommend either a foundation or a tinted moisturizer. If you've got particularily good skin with very little to no hyper pigmentation, blemishes, large pores, discoloration, different color than your neck etc then you really only need a tinted moisturizer to even out the skin tone. I am not so fortunate as to have skin like that so I use a medium to full coverage foundation. If you need help figuring out what type you might need just leave me a comment below or on the video and I'll help you the best I can. Hard Candy (sold at Walmart) sells a nice tinted moisturizer that my teenage Daughter uses. It works nicely and evens out her skin. I know Clinique and Dior also sell very good tinted moisturizers as well. LOTS of companies do, those are just the two I'm familiar with. As far as foundation goes, I use Loreal True Match liquid and really love it. Good coverage, doesn't break my face out and works well with my primer to stay in place all day. Again, if you need help in picking the right foundation just let me know.
If you've got oily skin or combination skin that gets oily in certain places you will need a powder to set your make up with so you aren't shiny. I am currently using Graftobian Face Powder in Skin Tone Light. You can order this online at www.graftobian.com and it's quite inexpensive at $4.49 for a half ounce bottle that is a LOT of powder. A little goes a long way. You can buy it here, it's not sold in stores in the US: https://www.graftobianmakeup.com/commerce/product.jsp?prodId=589&catId=2103. There are MANY different types of powder and I recommend using a loose one as opposed to pressed. It sets better and isn't as noticeable. It's also easier to correct if you over do it.
Then I recommend two kinds of concealer or 1 thicker concealer that you can thin down for under the eyes. One in a "pot" type container that is thick in consistency is best for blemishes and other hard to cover areas on the face and neck. The thinner, usually in a tube or bottle, is best for under eye concealing as it doesn't have the same tendency to cake and crease under there. You can thin the thicker one with some eye cream to use one for both things.
A good pair of eye lash curlers are essential in opening up the eyes and making the lashes appear longer and even fuller. I'm using the Sephora brand at the moment but Revlon makes a nice one. Just be sure it doesn't have "open sides" on the top part of the clamp otherwise it could pull your corner lashes out and pinch your skin. OUCH.
Tweezers are a must, even if we don't like to admit it. We all have unwanted hairs in places they don't belong. Plus we need to keep our eyebrows neatly groomed and get rid of the strays. (in video two I go over another option for hair removal other than pulling it out)
A brow brush/lash comb duo is a great tool to have to keep your brows looking neat and your lashes separated and clump free. You can get these at any drug store, usually a couple of dollars.
And finally a sharpener that has a large hole as well as a smaller one to fit all your pencils whether it be eyeliner, lip liner or even cream shadow pencils.
Video two is recorded and will be uploaded tomorrow. I hope these are helpful to you and if you have questions/concerns etc please leave me a comment and I'll help you any way I can. Thanks for stopping by today!
Thursday, January 13, 2011
The stuff
Good Morning/Afternoon/Evening, (whenever you happen to pop in)
If you read my last post you know I was having a hard time being able to blog or film videos because the children were home for Christmas. You'll never guess what happened this week.....FOUR DAYS IN A ROW OF SNOW DAYS IN NORTH CAROLINA!!!!!! Really? They went back to school for one week and in that week construction was started on one of our bathrooms. It had to be gutted so imagine the noise. So no filming for sure. Then this week, when we have a break from construction due to some minor set backs, the kids are home all week long. Prayerfully one of these days I will be able to get back to filming. So for now I have resolved myself to simply blogging all the many things I want to show you. We'll start with this one:


If you read my last post you know I was having a hard time being able to blog or film videos because the children were home for Christmas. You'll never guess what happened this week.....FOUR DAYS IN A ROW OF SNOW DAYS IN NORTH CAROLINA!!!!!! Really? They went back to school for one week and in that week construction was started on one of our bathrooms. It had to be gutted so imagine the noise. So no filming for sure. Then this week, when we have a break from construction due to some minor set backs, the kids are home all week long. Prayerfully one of these days I will be able to get back to filming. So for now I have resolved myself to simply blogging all the many things I want to show you. We'll start with this one:
My new favorite moisturizer of all time! I have very oily, acne prone skin. And the older I get the worse it seems to get. (You'd think it would get better...go fig) I've tried several different moisurizers, even oil free ones, and they all have made my face break out. Until this little beauty! AND, the best part, it actually does what it should do. Imagine that! My skin is feeling softer and healthier every day. It doesn't interfere with my make up application/wear and it smells fantastic. (in my opinion anyway). It's a bit pricey for a drugstore moisturizer but it's definitely worth it in my book. I paid $17.99 at Target. It is also organic, %100 vegetarian and not tested on animals. (here's the website if you'd like to check into it further: www.albabotanica.com) LOVE IT!
The second thing I would like to "show" you is this:
This is Wet n Wild's oil free eye make up remover liquid. I have a bit of trouble with things burning my eyes and making them feel "cloudy" when it comes to removers. And the ones I've found that don't cause those things...don't actually work. Especially not for long wear/waterproof products. This does both, doesn't burn my eyes or give me that "looking through a glass of milk" feeling AND it removes all my eye make up. Even my waterproof liners, mascaras etc. It has an "ok" smell to it. Not good or bad in my opinion. And you don't need to use a ton. One of the key features to this item, to me anyway, is that it only cost $1.99 at Walgreens! You gotta love a product that works, doesn't cause any issues AND is inexpensive. This is a keeper for me for sure.
I have one more item to show you but I haven't actually used it yet so I can't give any feedback. I will definitely blog about this next though:
Claim on back of box:
"This ingenious instant matte will remove shine-inducing excess oil and give an instant matte finish without drying. Use under or over make up to leave skin looking clearer, toned and refreshed."
The directions say to shake the bottle and apply using clean finger tips and a single drop at a time. Apply where "needed", avoiding the immediate eye area.
I will be using this today and will give you some feedback in my next blog. Boots is a drugstore in the UK and a cosmetics company. I bought this at Target whom carries some of the make up line and now some of the skin care line. It all looked interesting and like something I might try out in the future and none of it was expensive. This cost $5.99. Granted it is a small bottle but if it works like they say it does you shouldn't need much. I'll let you know.
I will be leaving tomorrow morning to drive to Florida to see my Sister and the babies. (I CAN'T WAIT!) I'll be gone for 9 days but I will be trying to blog as much as I can while I'm there. Maybe I'll even take you on an "excursion" or two! Stay tuned. Thanks everyone for dropping by and reading my blog. If you have any questions/comments/requests please leave me a comment.
Blessings,
Blessings,
Nicole
Sunday, January 2, 2011
The Christmas "Vacation"
Hello Everyone, I thought I should write a quick post explaining the lack of videos and blogging lately. You see, I have children. Two of them and they are awesome. I love them both very much and wouldn't trade them for the world and all the money there in. As the title of my post suggests, I don't really count this break from school a "vacation" for any of us really. With all the shopping, preparing, wrapping gifts, cleaning, cooking, baking, visiting and every other "ing" I can think of it's hardly a "vacation" from anything except quiet. Don't get me wrong, I am very far from any type of Scrooge. I LOVE LOVE LOVE Christmas! Always have and always will. Christmas was always a huge deal in our house growing up and I am the same way with my own kids and Husband. We go all out with decorating and baking and gifting etc. But that doesn't remove the fact that it is in fact a lot of extra "doing".

And then there's the wee little fact that the children are home for over two weeks from school. Day in and day out....all day....7 days a week.....ahem, anyway, as I mentioned before I love them very much and I love having them in the house and will surely miss her deeply when our Daughter goes away to college in the not so distant future. As some of you know we also have a Son with severe Autism. If you know anything of the disability you will put two and two together and know that this is NOT a vacation for him. Routine and structure and predictability are what he thrives on and Christmas "vacation" is anything but that. It starts with weeks of "parties" and shortened classes and new people in the classroom and school plays and much more that just drive him up a wall. He really really doesn't handle all that hullabaloo very well. Then, once that's done, there suddenly is no school to go to for a very long time and our Son is incapable of speaking or understanding much of what is said to him. So as you have guessed at this point, this is a very stressful time for him. Which in turn makes it a very stressful time for all of us.

But while it's difficult and stressful and sometimes feels hopeless, God has certainly used this trial of Autism to move and work in my whole family in a great and fantastic way. And Antuan has come a very long long way from the things he wasn't able to do/understand etc over the years and we know that's the Lord.
So my original purpose in this blog was to tell you why I haven't recorded any tutorials/reviews or written a blog in so long. Now my main purpose in writing this is to tell you that no matter what is hanging around your neck and making you feel like you can't pick up your foot to move one more step, the Lord can and will and is using that situation to heal you and bring you closer to Him and create you to be what He wants you to be in Him. And that is what really matters.
God bless you all. Happy New Year and see you in a day or two in a new video!
Subscribe to:
Posts (Atom)